Since 2008 I've gradually acquired more screen printing materials and I've found ways to incorporate printmaking into the curriculum because the kids enjoy it so much! After doing several test prints on paper (one of which we display), most students choose to print on one or more shirts (that they furnish).
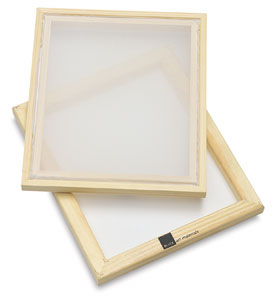
We use "Mask-Ease" to produce the print-ready design, waterbased Speedball and Blick fabric inks, 8xx screen frames and 60/65 Durometer squeegees that I order from Dick Blick Art Materials.
Students develop designs of their choice, scaled to fit on an 8.5 x 11 piece of white copier paper, and then reverse the image, especially if their design includes text! To do this, they either scan and reverse their image in Photoshop OR they place the reverse side of their paper against a window and trace it.
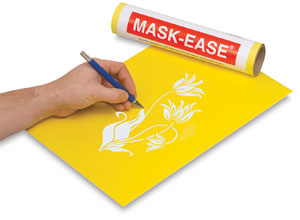
They use carbon paper (expensive and hard to find these days--and many of these kids have NO idea what it is!) to transfer their design onto the yellow side of the Mask-Ease.

Carbon paper is placed between the (reversed) design and the Mask-Ease.
Once the design is transferred to the Mask-Ease, they use X-acto knives to carefully cut away all areas of the design that they want to print, removing just the yellow top layer and trying not to cut through the bottom white layer.


Cutting through the top layer of the Mask-Ease
The Mask-Ease product comes with a clear adhesive plastic, and after students finish cutting out their designs, the clear vinyl is adhered to the top of the yellow sheet. This helps to hold in place any random "floaters" (such as the center of the letters "D", "A" or interior parts of their design that they wanted to leave unprinted). Next, the yellow sheet and adhesive are peeled off of the white sheet.


Next, the yellow Mask-Ease is carefully stuck onto the flat side of the fabric screen and smoothed into place. The clear plastic adhesive is removed.

Masking tape (and the salvaged clear adhesive) is placed around all the edges of the Mask-Ease to make sure that ink only comes through the cut-out places in the design. Paper is cut to use for their test and display prints, and a piece of cardboard is placed inside of the t-shirts before they begin printing.
The frame is turned over, and the design (which is now facing in the right direction) is centered on the paper (and then on the shirt). A spatula is used to transfer ink to the frame, and student helpers hold down the corners of the frame to keep it steady. The ink is pulled down over the design, then the squeegee is turned around, the ink is pushed back to the top of the screen, then pulled toward the bottom again. Students finish with a "dry pass" of the squeegee over their design to remove excess ink.
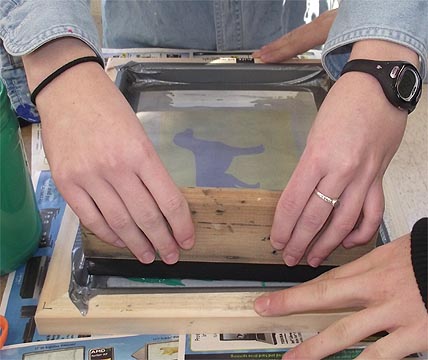
The frame is carefully lifted up to reveal the print underneath. Numerous prints can be made in one session, but at the end of the class, students must scrape the excess ink off the screen with the spatula (and return it to the container), remove and discard the Mask-Ease and the masking tape and thoroughly wash off all of the ink from the screen.
We've found that sometimes washing the screen, spatula and squeegee takes longer than the printmaking, but screen printing has become one of my students' favorite projects!
Screen Printing Workshop for Adults
Screen Printing with Middle School Students
Hand-Sewn Screen-Printed Pillows
Screen Printing with High School Students
Screen Printing with Transparency Film Stencils
BACK