After learning how to do screen printing to make custom-designed T-shirts, 8th Grade students used 9 x 12-inch screen printed pieces of white cotton fabric to create hand-sewn pillows.
Their pillow tops were ironed to heat set the ink and used as a pattern to cut other material the same size for the back of their pillows. They placed the "right" sides of the two pieces of fabric together and used straight pins to secure them.
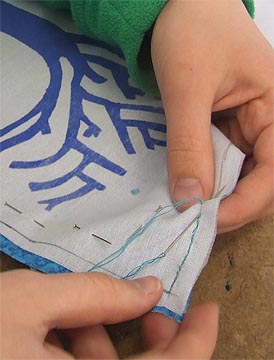
As some students had never sewn before, they used a ruler to measure a 1/4" line along the edges of their pillow top. The line would ensure that their seams were straight and that they'd "catch" enough of the fabric for the seams to hold when the sewn pieces were turned right side out. Needles were threaded and a knot was placed in the doubled piece of thread.

They used a back stitch to sew the two pieces of fabric together and I encouraged them to use small stitches (no longer than about 1/4"). To do the backstitch, they started on the line about 1/4" from one of the corners and brought their needle up through both pieces of the material. Their made their next stitch "backwards" (left) into the corner. They brought their needle up through the fabric about 1/4" to the right of the last stitch on the top.


They sewed all the way around the edges on the lines until they were within about 3-inches of the starting corner. At that point they tied off their thread and carefully turned the pillows inside out. They used polyester fiberfill to stuff their pillows and sewed the opening together with a whip stitch. To do this, they pinched the pieces of fabric together, maintaining a 1/4" "fold" on the inside. They sewed from one side to the other across the top of the opening.

They really enjoyed making these pillows and everyone wants to do more sewing projects!


BACK