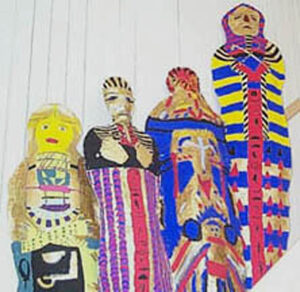
Grade Level: Upper Elementary
Materials:
White paper from roll, or large sheets of drawing paper, taped together
Pencil, erasers, scissors, tape, stapler
Hieroglyphic alphabet sheets, Egyptian symbols and definitions
Tempera or acrylic paint, brushes
Newspapers
Introduction:
Through the use of movies, books, or magazines, show students examples of Egyptian artwork and discuss Egyptian culture. Explain that they will be making a full-size “mummy case” which they will decorate with their name in hieroglyphics and with other Egyptian symbols.
Procedure:
1. Using a sheet of white paper slightly longer than the student is tall (either from roll or by taping sheets of paper together), have student lie down with feet together on the paper and with arms folded across chest.
2. Teacher or another student carefully traces around the student who is lying on the paper, squaring off the end towards the feet. (The tracing is best accomplished by having the students work in pairs.)
3. Once the outline is finished, have student use scissors to cut out the shape.
4. Students begin drawing their “mummy case.” They should include a realistic or stylized self-portrait, their name in hieroglyphics, Egyptian symbols that have meaning to them, and patterns that are similar in style to those found in photographs of real mummy cases.
5. After students have completed drawing their designs, they may begin painting them.
6. When the mummy case “cover” has been painted and is dry, have the student trace around it onto another full size sheet of paper to create the back of the case.
7. Paint this paper a solid color, and when dry, carefully staple or tape the front and back pieces together, leaving an opening on one side.
8. Using crumpled newspaper, stuff the mummy case (starting with the head and foot area) until it is full, then staple or tape closed.
(Note: It’s not as easy to find newspaper as it used to be! You can also check with local grocery stores that frequently throw out or recycle unused weekly sale flyers.)
