Merry Christmas to Us!

Wow!  My two sons and my daughter-in-law went together to buy us a small generator for Christmas!  We can use this while camping if we’re somewhere without electricity (it’s surprisingly quiet), and we can also use it at home in the event of a power outage.  This is a VERY cool and greatly appreciated gift!  Thank you!

generator-122716

As an added “gift,” my son, Brandon, and my Grandpups (Harper and Yuma) made the long, long drive from Colorado to Virginia to be home for Christmas!  While he was here, Brandon showed us how to use the generator, plus he had another surprise for us. 🙂

sharon-brandon-122516  harper-yuma-122516-1

Over the years, he’s done a lot of camping in remote areas of Colorado.  He has the same generator, and he also uses solar panels to keep everything charged.  Since he’d upgraded his solar setup, he brought us one of his original panels and a charge controller for our trailer, too!  The solar panel should be able to keep the battery on the Scamp topped up all the time.

We decided to mount the controller inside of one of the front dinette benches.  This meant that Wayne had to drill a small hole through the shell of the trailer to run the wires from the battery to the controller.

solarwires-122716   solar-wires-battery

One wire connects to the battery, and the other one attaches to the solar panel.  Once everything was connected, the blue light came on to let us know that the panel and controller were working properly.  For now (with the trailer sitting in the driveway for the winter) we have the panel on the south-facing end of the trailer.

solar-controller-122716  solar-panel-122716

What wonderful, Scamp-related gifts, and what a wonderful visit!

brandon-wayne-122716

Front Dinette & Bed Completed!

It’s so nice to have ONE project on our Scamp finished!

We can put all the cushions down to form a single bed….

bedcushions-091116

And the addition of a table pedestal (using a recessed base), also lets us use this space as a 2-person dinette:

dinette-table-091816  dinette-101516-1

We’re pleased with the way it turned out!  🙂

dinette-101516-3

Unfortunately, we’ve seen some small leaks again at the front of the trailer–IN the dinette area (arggghhh….).  While we’ll make sure that the front window is well sealed, it’s possible that we have some more tiny holes on the roof that are allowing water to get in.

This wasn’t a huge issue when it happened before when we just had the insulation up, but now that all of the marine grade hull liner is installed, it could be much more complicated to fix.  Not sure what we’ll do, but we’ve been considering painting the roof with Durabak, which is often used as a truck bed liner.  Guess we’ll figure it out….

Camping Trip (Almost…) to James River State Park – Sept. 17-18, 2016

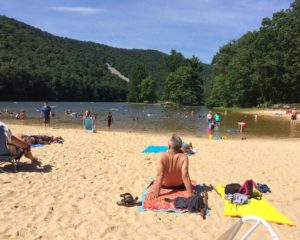
We finally had a free weekend–with no rain in the immediate forecast–so we decided to go camping at beautiful James River State Park.  We’ve been to this park several times over the years on day trips, and we were excited about camping there.  Realizing that the campground might fill up on a Saturday, we finally took the plunge and made reservations for Saturday, September 17th.

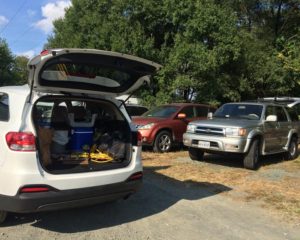
It seemed to take forever on Saturday morning to get all of our stuff organized and packed into the car and/or trailer: our cooler with homemade soup, cheese, butter, cream cheese, dip, eggs, etc.; our propane camp stove; folding chairs; cooking and eating utensils; clothes; extension cords; flashlights and more–but we were finally ready to leave the house.

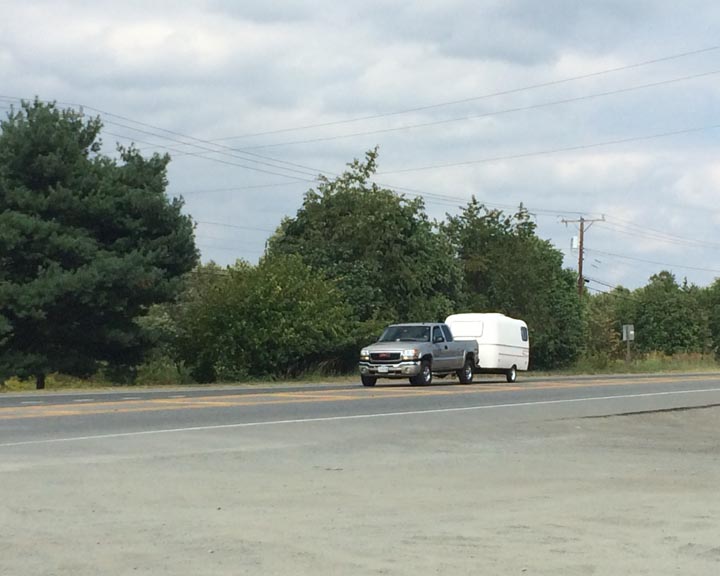
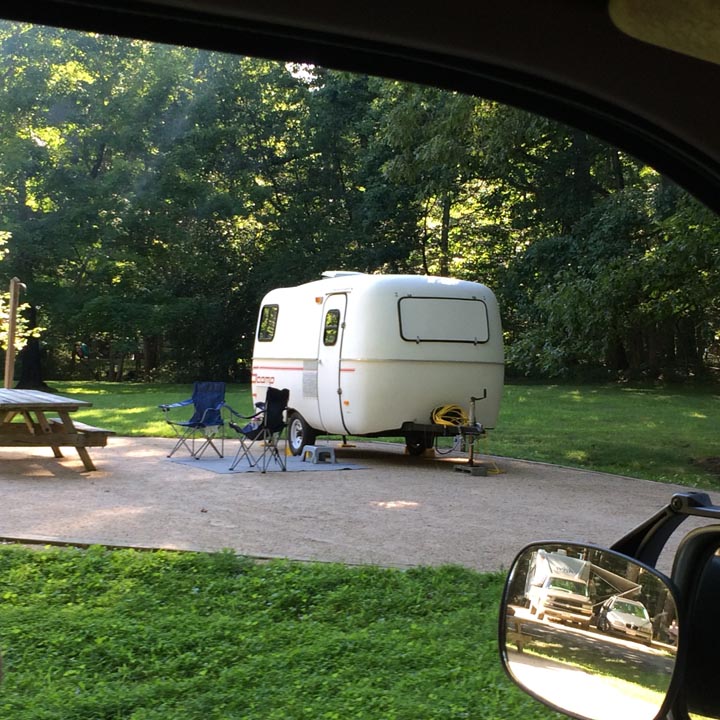
And leave we did!  It always makes me happy to see our tiny house tagging along behind us.  🙂

01-headingout

Smooth sailing as we drove on Rt. 250 West to Rt. 151, and then we turned left on Rt. 6.

00-map-crozet-jrsp

As we were approaching the intersection of Rt. 29 South, however, Wayne said there was something wrong because the battery light had just come on!  Ugh, not good!

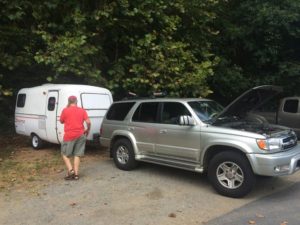
I remembered that there was a gas station and convenience store about 1/4 mile down Rt. 29, and we pulled in, thankful that we had a safe place to stop.  But what could be wrong?  Was the battery on the trailer somehow draining the 4Runner’s battery?  (The Scamp battery is set up to “trickle charge” from the vehicle’s battery.)

We unplugged the electrical connection between the car and trailer, and then Wayne opened the hood of the 4Runner to see if there was anything obviously wrong.  And–unfortunately–yes, there was something obviously wrong: The serpentine belt had broken and it was tangled up in the engine.  Seriously not good. 🙁

As frustrating as this was, we were still very thankful that the 4Runner had at least gotten us to “Shady’s Place” instead of stopping dead in its tracks on some narrow stretch of rural Rt. 6….

03-shadysplace

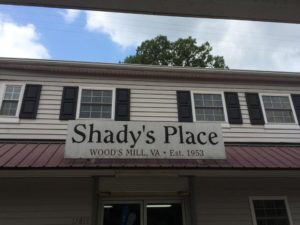
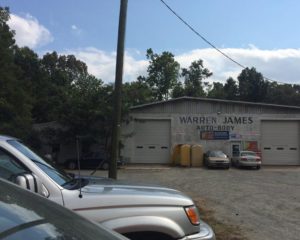
We went in the store and asked the woman at the counter if she could recommend a garage that might be open (on a Saturday–after noon…) She gave us the name and number of a garage in Lovingston.  We thanked her, went outside and called.  The man who answered said they only worked on tractor trailers. Darn….

I next called our insurance company’s “roadside assistance” number, and the woman I spoke with gave me numbers for other garages in the area that could provide towing. There was no answer at Garage #2, and the woman who answered at Garage #3 said she’d get in touch with her part-time driver and call me back.  Fair enough.  While waiting, I quickly called the campground to cancel our reservation. (Thankful again, this time for cell phones!)

In the meantime, we realized that we had more than just a problem with our vehicle, because we also had our trailer with us.  The woman at Shady’s had said they couldn’t guarantee that it would be safe if we left it on their lot, so we knew it had to go somewhere, too.  Well, darn.

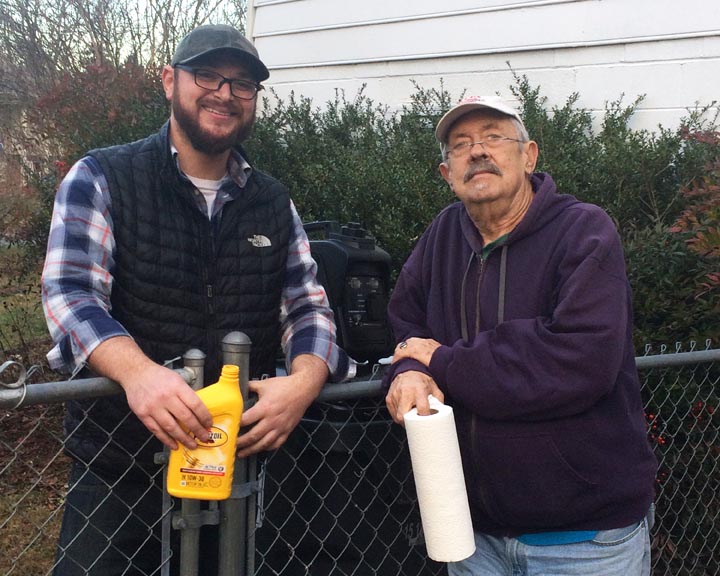
After some discussion about what to do, Wayne called our friend Mark to see if he could possibly help us out–and he could!  He said he’d meet us there with his truck in about 30 minutes, and that he’d tow the trailer back to our house. Excellent!

02-4runner-scamp-wayne-shadysplace

A few minutes later, the woman from Garage #3 called me back, apologized profusely, and said that their driver was unavailable.  She gave me the number of Garage #4 in Nellysford.  I dialed the number, and the man who answered at Stoney Creek Auto Center said that he could meet us in about half an hour. Yay!  “Fourth time’s the charm”, eh?!

While we waited for our rescuers, we picnicked in the parking lot on fried chicken and mac & cheese from Shady’s and washed it down with green tea that we had in the cooler. Fine dining in the hot September sunshine. 😉

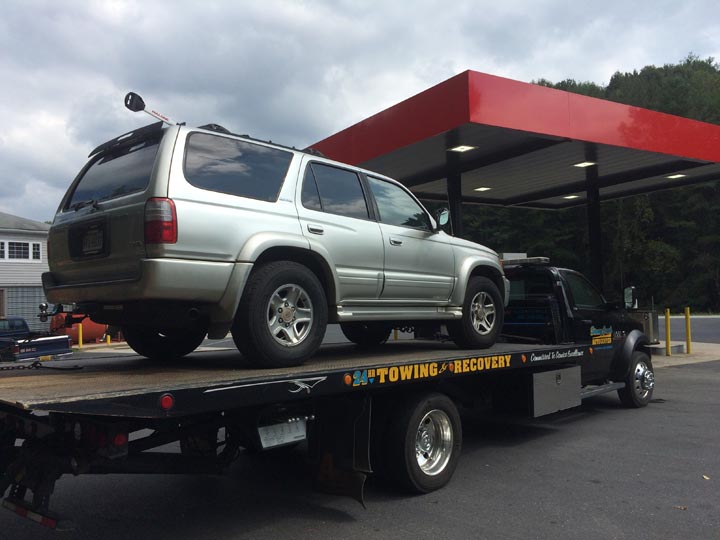
The tow truck driver arrived first, and he quickly and efficiently got the 4Runner loaded onto the rollback wrecker.

05-4runner-towtruck-091716

At first we weren’t sure where we’d have it towed, but then decided it would make sense to have it taken to one of our local garages.  I got in the cab of the tow truck with the driver, and Wayne stayed with the trailer to wait for Mark.  And so back up the road we went–back to Rt. 6, to Rt. 151, to Rt. 250 East and on to the garage.

About 30 minutes and $100 later, the 4Runner and I were safely deposited at the shop where All Will Be Made Okay….

06-4runner-warrenjames

…and before too long, Mark, Wayne, and the Scamp arrived to pick me up.

08-markgreenfield-scamp  09-markgreenfield-scamp

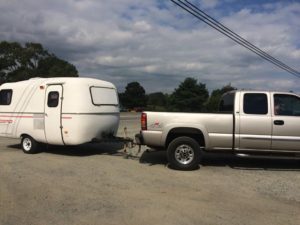
After Mark got the trailer backed into the driveway (not an easy task) and headed home with our thanks, Wayne and I drove over to the garage to get everything out of the 4Runner.

10-kia-4runner-warrenjames

Back at home, it took a while to get everything put away: our cooler with homemade soup, cheese, butter, cream cheese, dip, eggs, etc.; our propane camp stove; folding chairs; cooking and eating utensils; clothes; extension cords; flashlights and more. (Remember?)

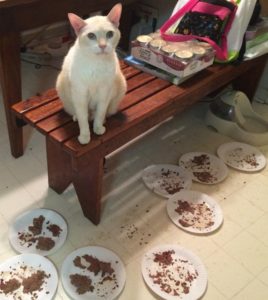
Since we’d planned to be gone overnight, we’d left tons of wet and dry food out for our four cats.  Since we were now not gone, Kai let us know that this arrangement was totally unacceptable. 😉

15-kai-food

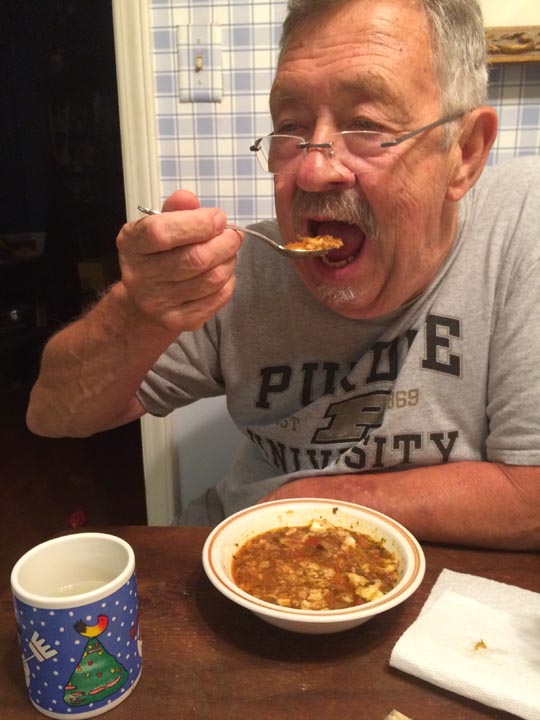
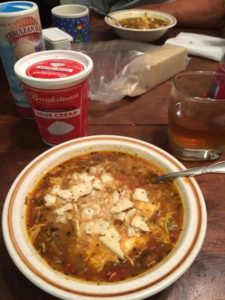
As to our food, we heated up the soup from our cooler (a delicious chicken chili), and ate dinner at the kitchen table.  Would it have tasted better outside on a picnic table at James River State Park?  Yes, maybe–but it was still wonderful!

13-chicken-chili  14-wayne-soup

And would we have enjoyed sitting by a campfire on this Saturday night at James River State Park?  Yes, of course!

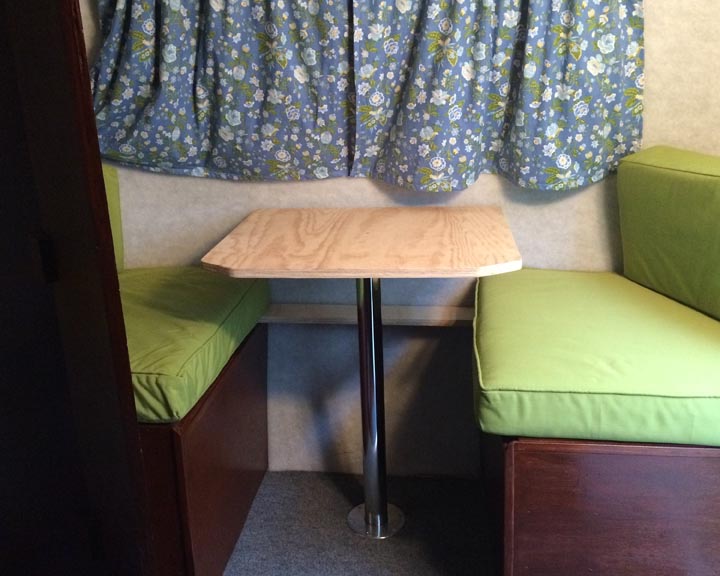
But you know what?  We’ve got a sweet trailer sitting just outside under a rising, almost-full moon.

11-scamp-porchlight  16-scamp-moon

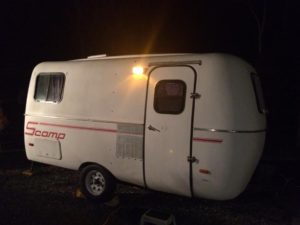
We can still go camping this weekend; it will just be driveway camping. 🙂

17-moon

Wow, Summer is Over — AGAIN!

July was a challenging month. Due to circumstances beyond our control, we weren’t able to get anything done on the trailer, didn’t go camping, and didn’t even go on any day trips.

Things improved by August, and we were able to do a one-night camping trip on August 7-8.  After a quick stop at the grocery store to get some ice and snacks, we were on our way!

001-4runner-scamp

Our destination was Sherando Lake in the George Washington National Forest near Lyndhurst, VA.   We didn’t have reservations, so we knew it might be iffy getting a campsite because the campground is very nice–and also very popular.   Fortunately, we were able to get the next-to-the-last open site in the section with water and electric, and a trailer right behind us got the last site!

001-sherando-sign

Our site was wide and level, and it didn’t take us too long to get set up.
011-scamp-campsite  012-scamp-campsite

When we checked in, the ranger at the gate told us that they’d had trouble with bears recently, and when the camp host came to greet us, he also warned us to make sure that all our food was securely stored.  They have big, steel bear-proof storage containers on each site in this part of the campground.

013-foodstorage-campsite

After getting settled, we drove down to the lake and enjoyed some time in the sun and the water.  SUCH a pretty place!

004-lake  003-wayne-lake

009-sharon-lake  010-sharon-lake

When we got back to the campground, we stopped to admire our sweet little trailer sitting exactly where little trailers are supposed to be–in a campground and not just in a driveway! 🙂

015-scamp-campsite  014-scamp-campsite

We explored a trail along the creek that borders the campground, and checked out the amphitheater.

016-sharon-trail  017-creek-campground

020-creek-campground  024-amphitheater

Wayne always seems to run into someone he knows when we’re out and about! 😉

026-wayne-smokey

We’d brought soup from home, so we heated it up on the camp stove and also got a fire going in the fire pit.

027-soup-campstove  028-sharon-dinner-campsite

Even though the temperature was quite pleasant–especially for a night in August!–there’s just something so relaxing about sipping coffee while sitting by a campfire….

032-wayne-campsite   034-wayne-sharon-feet-campfire

Once the crescent moon set, we could see so many stars!

035-scamp-moon   041-stars

As clear as it had been that night, however, we were surprised to wake up to rain….

044-rain-scamp-window

Without an awning or canopy, our plans for cooking breakfast outside weren’t going to happen.  At least we had coffee!

042-coffeepot

After a while, we hitched up and rolled on home, thankful that we’d been able to enjoy beautiful Sherando lake and campground the previous day and evening!

046-mirrors-rain

Now that we’re both back in school, the work weeks are super busy and we don’t have a lot of time for all of our trailer projects.  To be better prepared for rain while camping, however, we recently purchased a 10 x 10 canopy that was on sale Labor Day weekend.

And despite our crazy schedules, we’ve managed to do a bit more work on the trailer:  Wayne installed the recessed base for the pedestal table in the front dinette (no pictures yet), and I finally completed the cushions that will allow the dinette to convert to another comfortable bed!

bedcushions-091116

We really hope to get in at least a couple more camping adventures before winter!

Progress on the Front Dinette

After Wayne finished building the benches for the dinette, I put a couple of coats of stain on them using the gloss version of the American Chestnut color we’d used on the rest of the wood in the Scamp.  I really love this deep, rich color!

Benches-Stain-062216-2

Towards the end of May we’d ordered a 30″ x 70″ sheet of 4″ foam, along with upholstery grade polyester batting.   To get started on the cushions for the dinette, we placed the top of each dinette seat onto the foam, traced around them (they were slightly different in shape/size), and used an electric carving knife to cut out the pieces.

Cushions-052816-1   Cushions-052816-2

We then sprayed upholstery adhesive to each piece of foam and attached the batting.

Cushion-Batting-062016-1   Cushion-Batting-062016-2

As a relatively new “sewist,” I had some serious concerns about my ability to make cushion covers, so I decided to practice by first making sewn-on covers from sheet material.  I placed each batting-wrapped piece of foam onto a folded piece of thin white fabric (“wrong” sides together–not that I could tell which was “right” and which was “wrong”) and traced around it.  Then I drew another line 1/2″ beyond my traced line for the seam allowance.  When I cut through both layers, I had the top and bottom piece for each cushion.  Next, I cut a long strip of fabric that was 5″ wide for the sides of each cushion, calculating 4″ tall cushion + 1/2″ + 1/2″ for the seam allowance on each side = 5″.

Cushion-Sheet-layout-062216  Cushion-Sheet-062216-1

It was interesting to learn how to keep things reasonably even when sewing around the curves.   By making small snips along the raw edge of the side panel, it could be gently pulled to align with the curves on the top and bottom pieces as it was sewn together.  As a final step, I put the cushions inside of the covers and hand-sewed the seams closed.

I’m glad I took the time to make the practice covers.  Having some clue as to how this worked gave me a bit more confidence when I started on the real covers!

Cushion-Sheet-062216-4  Cushions-Benches-062716-1

The “good” fabric–a sturdy, durable outdoor material in Kiwi green–had become quite wrinkled since we’d purchased it, but I learned the hard way that it shouldn’t be ironed!  Whoops! Lesson learned, for sure….

CushionFabric-062716-Melt

But once again I put a folded piece of fabric on the floor (wrong sides together), placed the cushion on top of it, traced around it, and then measured and drew another line 1/2″ beyond the traced line for the seam allowance.  I cut long 5″ wide strips for the side pieces, but I also cut two 5″ x 32″ side pieces to make a zipper panel for each cushion.

AND I cut a 1-3/4″ wide long, long strip of fabric, folded the strip in half, and sewed in what seemed like miles of cotton cording to make piping.  Crazy as it sounds, I really do enjoy learning how to do new things (even when it’s challenging), and I figured if I was learning how to make cushions, I might as well learn how to do piping and zipper panels at the same time!

Cushion-Cover-062816-1   Cushion-Cover-062816-3

After I (finally) finished the passenger/curb side cushion, I *thought* it would be easier to do the second one.  Nope, I actually had more trouble with that one, and I had to take it take it off the cushion, turn it inside out again, and sew a wider seam allowance on the bottom panel to make it fit more snugly.

So were these cushion covers “easy” to make?  No, not really; at least not for me.  I understood the whole process in theory, but especially by adding the zipper, AND the piping, AND by having curves to work around, it was all pretty challenging.   They certainly aren’t perfect, but you know what?  They actually turned out pretty darned well!

Bench-Cushions-Wayne-062916

We still need to design and make the table, plus I need to make two smaller cushions that will be backrests and/or the rest of the mattress, depending on whether the front is used as a dinette or as a single bed.  For now, though, I’m very pleased to have the big, curved covered cushions DONE! 🙂

Benches to Bed to Benches!

Wayne got a lot done on the front benches for the dinette!  He finished putting the paneling pieces around both of them, and he also got the trim installed.  This looks really, really nice.

Benches-Trim-060516-1

Benches-Trim-060516-3

Benches-Trim-060516-2

Next, he measured and cut the piece that will fit between the benches when the dinette is converted to a bed.

Bench-Bed-060516-2

He tested it, and yes, it’s do-able as a single bed–but isn’t somebody supposed to be making the cushions?!  (Oh, yeah, that’s me….)

Bench-Bed-Wayne-060516

We still have some decisions to make regarding how to best make this center piece between the benches work as a table, too.  It can’t be the full back-to-front length, because it would be too hard to get into the seat on the driver’s side.  But it’s so exciting to see everything that Wayne has accomplished over the last two weekends.  (In addition to being a fine craftsman, he’s also an artist–and it shows. <3 )

Memorial Day Weekend – 2016

The foam I ordered for the cushions arrived this week!  On Saturday afternoon we used each bench seat top as a pattern to trace around on the foam, and then we used an electric carving knife to cut out the unique shapes for each dinette cushion.  (We purchased the carving knife from Goodwill last summer, and used it to cut the Memory Foam mattress for the bed. It’s come in handy!)

Cushions-052816-2  Cushions-052816-1

We *think* we have enough foam left to make small back rests, which will also cover the table when the dinette is converted to a bed. I’ll probably make some pillows to fill in, too.

After we got the foam pieces cut out, Wayne reinforced the bench frame with another support piece, and took measurements for the paneling that will cover the sides of the benches.

It was really hot in the trailer (close to 90 degrees by afternoon!), so I quickly sealed up the area around the A/C with aluminum tape, and turned it on.  MUCH more pleasant working conditions! I sure wish we’d put it in LAST summer when we were doing so much work inside….

AC-052816-1

On Sunday (before it started raining–again!), we sanded the bench seats.

Bench-2016-052916-0-Sand

When he was looking for a large drill bit to make a hole in the “access cover” section of the seat, Wayne found one of my Dad’s old hand drills, and it still worked well!

Drill-052916-1-Wayne

Drill-052916-2-Sharon

As I was drilling a hole through the top of the second bench top, I couldn’t help but think of how my Dad would love to be helping with all of these projects….  While my Mom was a somewhat reluctant camper, my Dad greatly enjoyed having a tiny home on wheels.

Bob-Ruth-Camping-July1970  ShastaTrailer-Summer1970

Each summer when I was a kid, vacation meant a road trip along the East Coast, (or to the Midwest or to Canada), with a small travel trailer following along behind us.  And yes, a lot of my desire to have a trailer now stems from the wonderful memories that were made when I was young, traveling around the country with my parents. 🙂

Car-Camper-Sharon-July1967 Car-Trailer-CanadianBorder-1966

Anyhow, by the time we called it quits on Sunday due to the rain, both bench seats (with access panels cut out and functional) were secured to the frames:

Bench-2016-052916-1

Paneling to cover the front and side of each bench was cut to height, but not to length; we’ll need to make a template out of cardboard to figure out how to cut the curves….

Paneling-Bench-052916

We also rough cut a scrap piece of Formica and put it on one of the counters, just to see what we thought.  We were both surprised by how much brighter the area instantly became with an off-white counter instead of just with the stained wood.  This isn’t a high priority project, but it’s certainly something to think about.  We’re also still looking at potential back splash options.

Counter-2016-052916-1 Counter-2016-052916-2

And in the meantime, I’m watching dozens of video tutorials about making cushions, and trying to decide if I want to complicate matters further by making piping to go around the edges of the cushions!

Yes, cushion-making will be a challenge, but almost exactly a year ago I bought my very first sewing machine, and I was really struggling to learn how to sew well enough to make simple curtains for the trailer.

Sharon-071215-1

Well, look where that new interest led! 😉

BabyBlanket2-122415-2 BabyBlanket-112115-03

WatermelonPurse-112115-Finished ApplePurse-111315-7-Front-Revised RaspberryPurse-111515-lowresolution

CatPouches-120315-1 Minion-Bags-123015-2

ZipperedBags-052616-4 ZipperedBags-052616-5

So you never know!  I was never interested in sewing when I was younger, and I had no idea that Wayne and I would find ourselves in the process of converting an empty fiberglass trailer shell into our own comfortable and functional tiny home on wheels. Life is full of surprises!

UPDATE: Monday, May 30, 2016

Wayne got some more work done on the benches.  He put in more reinforcing upright pieces, and then he used cardboard templates to cut the first two pieces of paneling to start closing in the bench seat frames.  Looks great!

Paneling-Bench-053016-1 Paneling-Bench-053016-2

I’m not sure how well this unfinished paneling will take stain, but that’s the plan right now–staining to match the other wood in the trailer. 🙂

Working Between the Raindrops…

It’s been one of the wettest Springs I can remember, and that’s made it hard to get a lot done on the trailer.  Without a workshop or garage, all sawing or sanding has to happen out in the yard.

Today was one of those rain, sun, rain, drizzle, sun–nope–rain kind of days, but Wayne had just enough time to get most of one bench and bench seat modified for storage access.

Bench-2016-0522-1

With the seat in place, he reached underneath to trace a line for the area that needed to be cut out.  (Prior to this, he attached two of four support pieces to the upper bench frame. You can see the side pieces in place, after the center was cut out.)

Bench-2016-0522-2

He’ll make a small hole in the top of the seat so that it can be opened–and do the same thing for the other bench.

Bench-2016-0522-3

In the meantime, I’ve ordered 4″ medium-density foam which will be cut to match the shape of the bench seats:

We’ve also bought outdoor fabric at Jo-Ann’s for the cushions. After thinking we’d opt for a dark blue, we decided to get a green that will coordinate with the green in the curtains, and yet would go with other colors if we’d decide to switch out the curtains for a different pattern at some point.

For either camping or for more project work, we’re ready for some dryer weather!


Sittable Seats!

I’m pleased to announce that our bench frames have been screwed to the floor, AND that they can be sat upon!  We made a template to get the curves for the seats accurate (which wasn’t particularly easy….), and then Wayne cut sheets of plywood to fit each side.  Beautiful job!

Bench-2016-0507-1 Bench-2016-0507-2

Right now the tops are just resting on the frames, but our plan is to permanently attach them after cutting openings in the top to allow access to the storage space underneath.  An online friend who did an incredible job with the restoration of his “Haunted Mansion” did something similar.

Now that I have a template for the bench tops, I need to figure out how to make the cushions for the seats.  I want to use 4″ medium density foam (since the dinette will sometimes be converted to a bed), and I’m probably going to opt for a solid royal to navy blue color, which should look okay with the (busy) curtain fabric.

Curtains-071215-4

The last time I was at Joann’s, I briefly looked at the outdoor fabrics, so that might be a good option.  I don’t think I’d go with a regular, heavy-weight upholstery material, although duck cloth might work.

I’d like to put zippers in the cushions on the hidden side, and this could be interesting since the hidden side is also the curved side.  (But as a side note, I am so NOT intimidated at the thought of sewing in zippers; I just kind of jumped into that when I started making purses.)

In addition to the cushions for the seats, I’ll need to make two cushion pieces out of the same foam to serve as back rests AND to cover the table when the space is used as a bed.  Since the benches are fairly deep, I might need to fill in with some throw pillows.

There’s still a lot to figure out (with ALL of this), but I’m ready for the challenge! 🙂

A Table for Two

Well, I guess we’ll eventually get around to the table part of this project, but first we need to make the benches for our future front dinette. Scamp gave us one challenge: a narrow space and curved walls. We’ve given ourselves another challenge by wanting a dinette that can convert to a bed.  After lots of measuring and drawing and cutting, the pieces were ready to be assembled.

Bench-2016-0424-1  Bench-2016-0424-2

Each section was glued and then screwed together.  The shape seems somewhat odd, but it maximizes the available floor space without interfering with the curve of the walls.

Bench-2016-0501-1

We paused part way through the assembly process to make sure that the first bench would fit through the door AND that it would fit in the space the way we wanted it to.

Bench-2016-0501-2

After assuring ourselves that everything seemed okay (including the height), we finished adding all of the vertical support pieces (a total of 11 on each bench) and then took them in the house where we added more glue to the joints.

Next steps will involve screwing each bench to the floor, and adding paneling pieces to the outer (visible) sides.  Pieces of plywood will be cut to fit the shape of the curved walls to form the bench seats, and we’ll design them so that we have access to the storage area under each bench.

So funny–last year this time, I was learning how to sew in order to make curtains for the trailer.  As soon as we have the seats cut out, it will be time for me to figure out how to make (i.e. sew) the cushions for the dinette.  And in and around our various projects, we hope to go camping with it–as is–as soon as we can! 🙂