Figure Sculptures
Students started this project by analyzing full-body images showing human proportions. They also tested the 7-8 "heads" tall theory, and when they measured each other from the top of their head to their chin--and then measured their total height, and did the math--they were surprised to find that virtually all of them were between 7-8 "heads" tall!
After practicing drawing proportionately-correct "stick" figures from these photographs, they also spent a couple of class periods drawing from life.


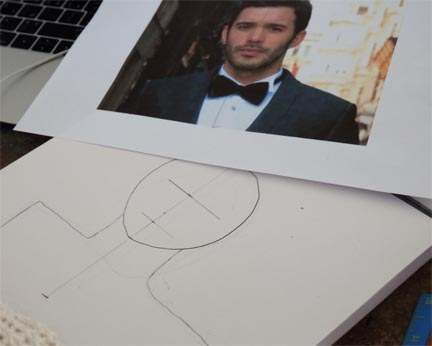
Students could choose to sculpt either a 6-inch tall (approx. 15 cm) portrait bust or a 12-inch tall (approx. 30 cm) full-figure. They searched for an image of the person they wanted to sculpt, and I printed out their picture. The next step involved accurately measuring the person in the photograph, and doing even more math to figure how how to make it the required size.
For example, if the full-body image of the person in their photograph was 17 cm tall and their sculpture needed to be 30 cm tall, they measured from the top of the head to the chin in the photograph and recorded that measurement to the closest half-centimeter. Then they'd measure from the top of the head to the waist and record that measurement, from the shoulder to the elbow, waist to knee, and so on.
They measured the "longest" distance from one joint to another and noted that the other arm or leg was likely the same, even if it was distorted by foreshortening or in a different position in the photograph. By the time they finished, they had a lot of equations on their page that looked something like this:
They solved for all of the "x's" and did a proportionately-correct simple drawing of the reference photograph. Once they had their full-figure drawing completed, they used wire to form the basic "skeleton."

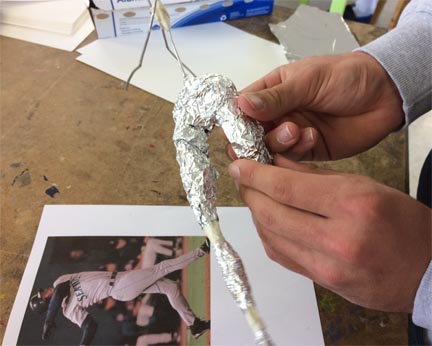
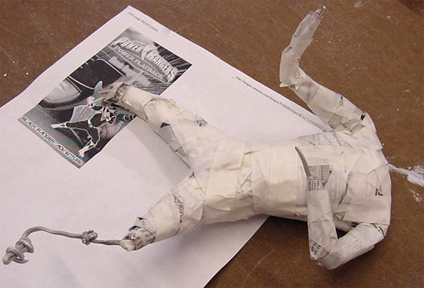
They used foil and small amounts of masking tape to add "muscle" to their wire "skeletons."


A similar process was used by students doing portrait busts:

After all of the foil was in place, thin layers of Sculpey were used to form the skin
(and sometimes the clothing), and the sculptures were baked in a large toaster oven, and then painted with acrylic paint.
Standing sculptures needed to be able to stand, so simple and appropriate "environments" were also constructed.


*********************************************
THE SCULPTURE PROCESS IN PREVIOUS YEARS
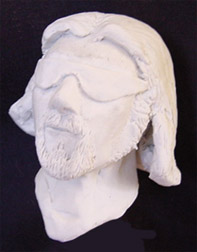
Instead of using Sculpey to form solid heads for the figures, we followed the guidelines in Maureen Carlson's books, "Family and Friends in Polymer Clay" and "How to Make Clay Figures" and made aluminum foil "eggs," which were covered with a thin layer of Sculpey. This not only reduced the weight of the heads, but it also conserved our clay. I highly recommend both of these books and my students have used them extensively while working on their sculptures. Ms. Carlson's step by step illustrations are wonderful!
We used glass "pearls" as eyes for the figures. These were purchased inexpensively in the crafts department at Wal-Mart. Beware of using any type of bead, however, that is made out of plastic, as it might melt when the heads are baked! The glass "pearls" do fine in the oven, and add a spooky--yet "realistic" touch--early on in the process.


Glass "Pearl" Eyes, New in 2004-2005
Students started with the heads of their figures, getting the basic shape and size established. Once that was done, they used the roughly sculpted head as their unit of measure, and drew a simple, proportionately correct figure on a large piece of paper. Most sculptures are between 12-18" tall. Aluminum wire, salvaged from electricians' entrance cable, was used to create a "skeleton" directly over their drawing.


Arms and legs were attached by first crimping pieces of wire onto the "torso" and then reinforcing with small amounts of duct tape. They used masking tape to mark the placement of elbows and knees, then bent the wire to the desired position. "Muscle" was simulated with newspaper and masking tape, and papier-mache was used to form "skin" for any "flesh" that wouldn't be covered with fabric.

In most cases, hands and feet were made from Sculpey, and after the head, hands and feet had been baked, they were taped (and/or hot-glued) and then papier-mached onto the body.


The Sculpey was painted with acrylic paint, clothing was made from papier-mache or fabric, props were created, accessories were added, and all manner of creative problem solving took place for this project. Students are always required to make a sculpture that is so well balanced that it can stand on its own (feet may be glued to a base) OR they must create props or "environments" that will support their sculpture in a realistic pose.


GALLERY


Resources
These are awesome books!